
Today's Project Is:
A Portable Changing Station!
It's perfect for Camping, Traveling, to use Around the House,
and Especially In An Emergency!
Here It Is:

The Pockets in the Left Side Can Hold:
12 Large Diapers.
The Pockets in the Right Side Can Hold:
Baby Lotion, Wet Wipes, Baby Powder,
Baby Rash Cream, Hand Sanitizer, Receiving Blanket,
Extra Socks, Onsies, Binkie, Bottle, and Toys.
It folds up to keep items secure.

I'm going to add handles to the ends but I'm still deciding
what to use to make them.
The Portable Changing Station
can be carried in a canvas bag,
a suitcase, an emergency duffle bag or by the handles.
Also Included:
A Two-Sided Changing Pad.
(One side has plastic and the other side is a towel.)


You Will Need:
1 Hand Towel
1 Bath Towel
Thread to Match
Fabric
Fleece
You will need to measure the size of your hand towel for
the amounts. All hand towels are NOT created equal!
You will need to add an extra 1/3 yard of the printed fabric
to trim the ends of the bath towel.
Blanket Casing
Ribbon
Scissors
1 Large Button
Sewing Instructions for the
Two Sided Changing Pad:
Cut a piece of fabric the same size as your hand towel.
Cut a piece of fleece the same size as your hand towel.
Cut a piece of plastic the same size as your hand towel.
I added ribbon loops between the plastic and the towel.
(Just for looks!)
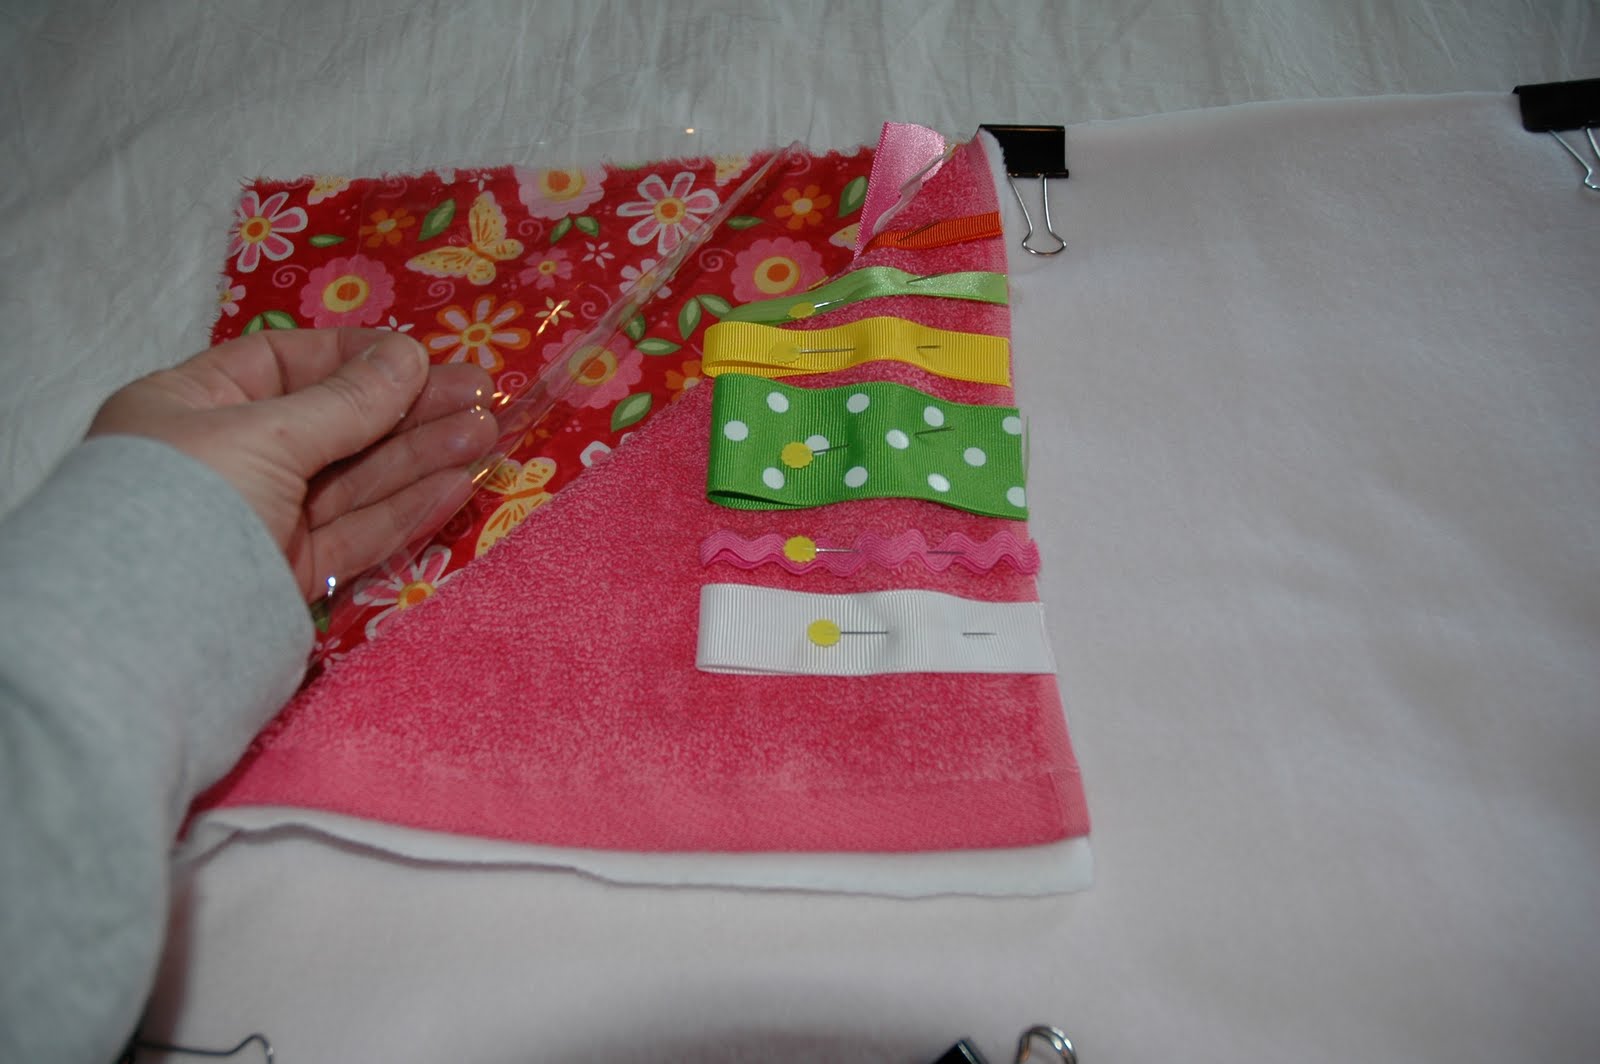
Clip the hand towel, fabric, fleece, and plastic together in
the order listed above.

Make sure the right sides of the fabric towel are facing each other
with the plastic in between,
and then add the fleece to the top of the fabric.

Sew the two sides and the top seams.
Slip your hand between the plastic and the towel and
turn it out, so that the seam is on the inside.
The fleece will be sandwiched between the towel
and the fabric when you are done.
Use the blanket casing or thick ribbon to finish the raw edges.

I added ric-rac over the ribbon on the outside.
I also added a bow and a button. I put them over the ribbon
where I started and stopped to cover the seam.
Hand-Stitch the bottom to close and finish the changing pad.
Start ribbon in the center-front of the changing pad.

Back Side

To Make the Changing Station:
You will need to cut two 4" strips of fabric the width of
the bath-sized towel ends.
Pin the strips just below the end seams on the towel
with the right side facing the towel.

Sew the fabric to the towel using a 1/2" seam.
Fold the strip in half and flip over the other side of the
end seam of the towel.


You are basically covering the end seam of the towel
with fabric.
Sew the folded edge to the other side of the towel.
The left side is complete.

Fold finished towel ends into the center to make the pockets.
I used diapers to decide the depth of my pockets.

(They are a little less than 1/4 the length of the towel.)

Sew the two outside edges only.

Turn pockets so that the seams are on the inside.

Use diapers as a guide for the pockets.
Everything else seems to fit into that size.
Pin between the diapers to create pockets.

Remove the diapers and sew pocket dividers.

I added a second pin to the bottom to use as a guide
so that my lines would be straight.

I folded the bottom up to the top to match the pins.

Add contents to pockets.
You can fit 2 diapers into each pocket.
(It's a little snug, but it works.)


Fold each side into the center over the pad.


Fold in half from left side to right side.
Right in the middle of the pockets.
Wah Lah . . . A Portable Changing Station!
This can also be used as a clean place to lay a sleeping baby.
Just make sure to flip the changing pad so that the towel side is up.
Add These Items To
Your Portable Changing Station:
Diapers
Wet Wipes
Lotion
Hand Sanitizer
Diaper Rash Cream
Baby Powder
Toys
Binkies
Bottles
Socks
Fingernail Clippers
Bulb Syringe
and a few Extra Nursing Pads.
That should cover it!
I'm in the process of making one for a baby boy,
as well as a denim one for either.
I just needed a girl moment to start off with!

11 comments:
Well Trisha... I feel like I know you, after all I've spent lots and lots of time with you over the past few days (okay... your blog!) I have printed everything off for my vital records binder, got it in sheet protectors, and now it is time to start filling it all out, etc.
You have some amazing projects, templates, and ideas. Thank you again! I do have a couple quick questions, if you don't mind.
1. Do you recommend laminating the index tabs?
2. You mentioned vital record cards that you had worked on in RS (for weight, height, figure prints...), wondering if you have a template for that?
3. Could you tell me more about these preparedness banks? Is it a sealed #10 can?
4. For these awesome mixes you have in jars, how long do they last like that? Are you supposed to put in an oxygen pack or seal them some how?
Okay, I hope I am not overwhelming you. You have certainly provided an amazing service! Thanks!
Not only is this smart, it is adorable. If my Sewing skills were up to par with you I'd be making this for that baby shower I am going to next week.
Love it.
Natalie . . . I'm soooo excited to hear that you are working hard. Way to Go!
Here are the answers to your questions:
#1: I would laminate the tabs, but they are pretty sturdy either way, just make sure the double-sided tape you use to attach them to the sheet protectors is permanent. Laminated tabs have a mind of their own until you get them secured.
#2: You can use the cards I used for the Emergency I.D. Wallet. The Vital Records Binder has a larger version of the same thing.
#3: The Preparedness Banks are just sealed #10 cans. You can check out the canner if you want to make one at home, or just add an extra can to your dry pack order and make one while you're there. I LOVE THE DRY PACK CANNERY!
#4: Use an oxy-pack in everything except the sugar. Oxy-packs remove not only the oxygen, but the moisture as well and will harden your sugar. My Food Saver has an attachment just for sealing jars. If you already have a Food Saver, you can purchase the jar sealer for between $5-$10 dollars. They come in wide-mouth and regular jar sizes.
#4.5: They will last for a very long time. Look up the dates on the cannery order form. Once sealed, the mixes can last as long as the shortest ingredient in your mix. For example the flour may only last for 10+ years while the rice can last for 30+ . . . go with the 10+ year plan.
Hope that helps!
Trish
Cute Girl With a Plan . . . Get that sewing machine fired up! If I can do it . . . So can YOU!
Trish
Thank you so much for answering all my questions. I don't have a Food Saver, so how do you recommend sealing the jars? Thanks.
Make sure the jar lids are clean and dry. Use a new lid and an oxy pack. They will still have quite a long shelf life, just not quite as long as with the food saver. You're welcome to come and use mine!
Watch the D.I. they have them there sometimes.
Trish
I forgot to tell you to make sure the lids are tight on the jars. Store them in a cool dry place to help with the shelf life.
Trish
Ok, can I please be your friend??? You have become an inspiration to me and I have been telling all my friends about you! A few are hooked as well. You have a way of sharing preparedness so it is fun, adorable and super easy!!!
Thanks so much!
Thanks for sharing your wonderful ideas, I just learned about your blog and can't get enough of your ideas. Thanks for all your hard work and time help others like me.
LOVE IT! Just featured you at The Idea Room!
what an awesome project!! This would be great for beach/water trips too! Thanks for sharing
Post a Comment